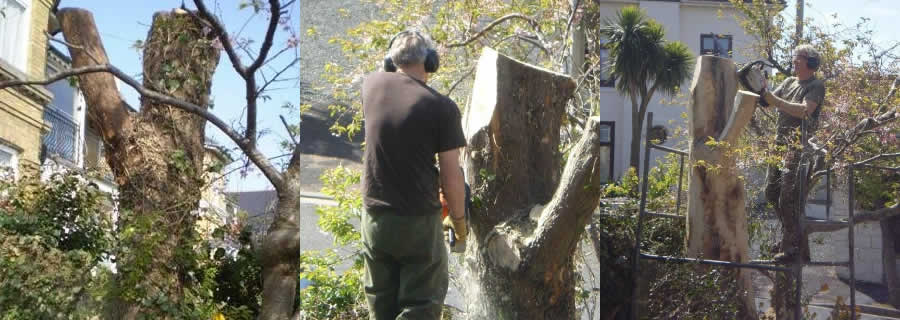
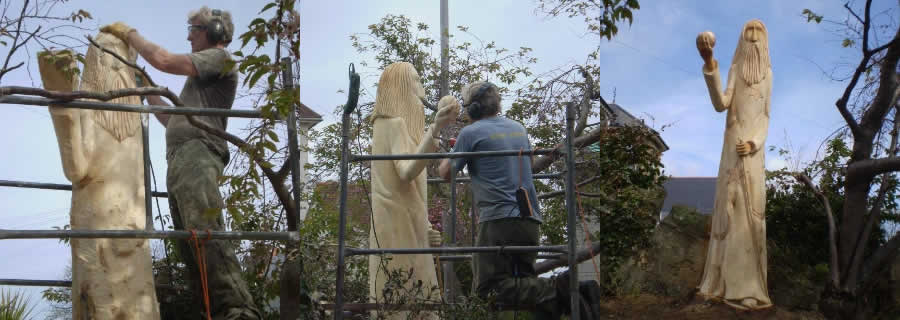
This page goes through the process of how I carve my sculptures from the base tree to the finished sculpture.
Stage one – Contact
- Client phoned and asked whether Paul could carve a Wizard from the stump of a tree that he’d recently had lopped in his front garden
- As the client lived fairly locally Paul arranged to visit and view the stump. (If the client lived further away Paul could have based his design on digital images of the stump).
- Paul drew up an initial design and emailed it to the client.
- The client suggested a couple of minor amendments and Paul redrafted the design.
- The design was accepted and Paul arranged to carve the sculpture the following week.
Stage two – Carving
- The first part of the process was to remove the outer bark of the tree with a large chainsaw and then to draw a rough outline of the wizard. A side branch was used to create the wizard’s arm and it was important that the basic shape was proportioned correctly at this stage.
- Then followed a closer cut with a smaller chainsaw saw fitted with a special carving bar to create a rough cut of the wizard.
- The head was the first body part to be finished and this was created by careful cutting as close to the finished features as possible using the carving chainsaw, followed by sanding with power sanding tools and detailing with carving chisels.
- Then the cloak and arms were sanded to create shape and to achieve a smooth finish.
- The hands and crystal ball were carved in detail using the same tools and processes as for the head.
- The finishing details were to chisel carve the stars and moons on the wizards cloak and to insert his staff.
The entire process took 3 days.
The Carved Tree Process


